
Progress in all forms of yoga is directly related to how persistent and regular one practices.This Yoga Asanas sequence will wake up the body and activate essential muscles to infuse your day with stability and openness.
Standing Position - Yoga Postures or Asana in standing position
Standing poses, which strengthen the legs and core, are some of the first foundational poses. Stand erect with the feet quite close together, heels and the big toes touching each other. Hands touching thighs, this position helps achieve stability of pulse. Perform below listed asnasas as per given guidelines
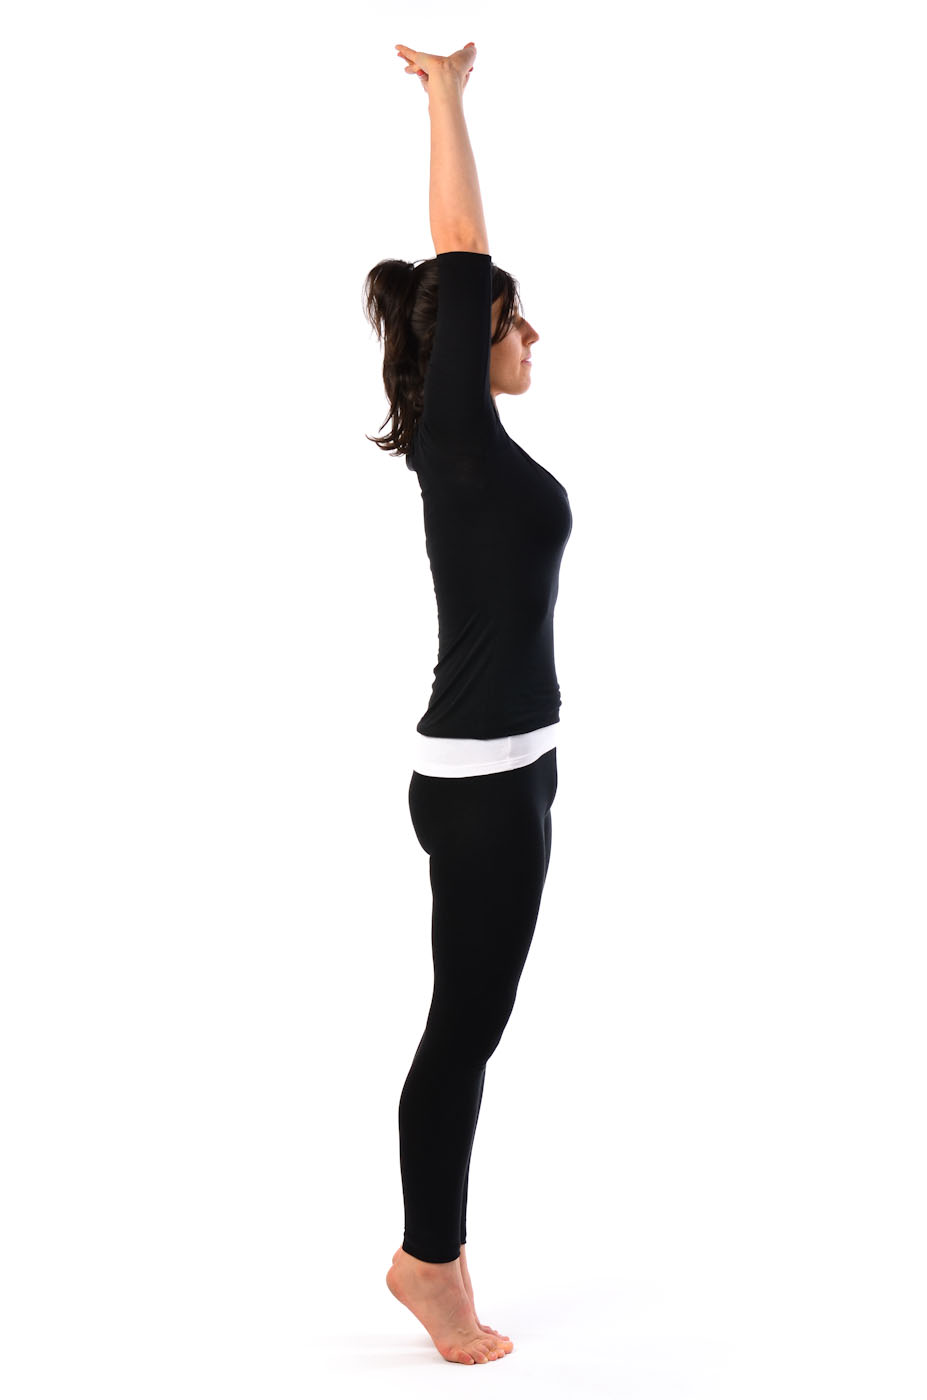
Tadasana : The Palm Tree Pose
Steps:
- Stand straight with toes and heels touching.
- Raise the hand above the head.
- Interlock the fingers and turn it upwards. The palms should be facing the sky.
- Take a deep breath and stretch the arms, shoulders and chest upwards.
- Raise the heels so that the weight of the body is borne by the toes.
- Stretch the whole body from the feet to the head.
- Remain in this position for few seconds.
- Bring down the heels while breathing out.
- This is one round. One can practice up to 10 rounds.
- During the whole practice the eyes should remain steadily fixed in front little above the head level.
- Then tighten the thighs, pull belly in, press shoulders back and keep arms beside torso.
- Breathe deeply, hold and then exhale.
Trikonasana : The Triangle Pose

Steps:
- Stand with the feet together and the arms by your sides ( see the tada asana).
- Separate the feet slightly further than shoulder distance apart.
- Inhale and raise both arms straight out from the shoulders parallel to the floor with the palms facing down.
- Exhale slowly while turning the torso to the left, bend at the waist and bring the right hand down to the left ankle. The palm of the right hand is placed along the outside of the left ankle. The left arm should be extended upward. Both legs and arms are kept straight without bending the knees and elbows.
- Turn the head upward to the left and gaze up at the fingertips of the left hand. Inhale and return to a standing position with the arms outstretched.
- Hold this position for the duration of the exhaled breath. Exhale and repeat steps 4 - 6 on the opposite side
- Remain in the forward bending position for the duration of the exhale breath. Do two or three repetitions (one repetition consists of bending forward on both sides).
Ardha Chandrasana - Half Moon Pose

Steps:
- To begin the yoga pose, start with Triangle Pose (Trikonasana), while the left hand rests on your hip.
- Then, bend your right knee slightly by moving it forward and away from you.
- Move your right hand in the forward direction as well, a few inches away from the right foot.
- Exhale, and depress your right hand and your right heel against the floor for better balance.
- Lift your left leg up and bring it parallel to the floor.
- Then, raise your left hand and align it with your left leg; the weight of your body should be borne by your right leg.
- Look up and concentrate on your fingers and stay in this pose for a few seconds.
- Then, lower the raised leg to the floor and exhale simultaneously.
- Perform the same steps on the opposite side.
Virbhadrasana : Warrior Pose

Steps:
- Start with the Mountain Pose.
- Jump or walk so that your feet are around four feet apart.
- Inhale and raise both arms parallel to the floor, turn your head to the left, turn your left foot 90 degrees and right foot about 45 degrees.
- Exhale and bend your left knee (trying to keep the knee just above the ankle, it can be before the ankle but don't let the knee go away from the ankle). Keep the hips in the same angle (180 degrees) as for the arms. Stay in this position for 30 seconds to one minute breathing normally.
- Inhale straighten your knee and exhale hands down and come back to the mountain posture.
Seated Poses- Yoga Postures or Asana in Sitting positions
Seated poses are focused on deep stretching and often include forward bends. Start Asanas in sitting position with both legs together and stretched, toes erect, spine erect and both hands straight and palms resting on the floor and do following asanas as per instrctions given
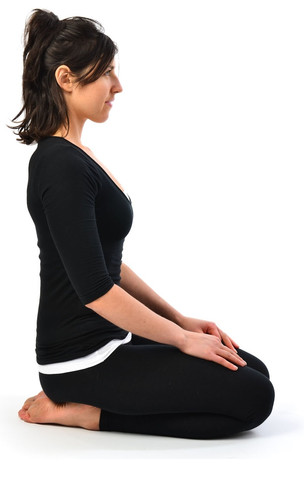
Vajrasana : The Thundbolt or Diamond Pose
Steps:
- The vajrasana is a seated posture.
- Begin by sitting back on your heels and placing your knees, legs and feet together.
- Keeping the back straight place the palms of your hands down on top of your thights.
- Breath gently thorugh your nostrils and sit in this position for at least three minutes.
- The Vajrasana can be held for as long as is comfortable (and depending on the reason for doing the posture.
- The Vajrasana is a versatile posture well suited for meditation, rest in between other seated postures, or as an aid to digestion.
- The Vajrasana is the first stop in various other yoga postures such as the Anjaneya Asana (Salutation Posture) and the Ushtra Asana (Camel Pose.
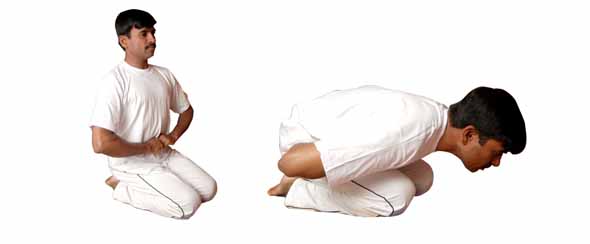
Mandukasana
Steps:
- Sit in vajrasana.
- Make fists of both your hands by placing the thumbs inside the fingers.
- Place the fists on your navel together.
- Press the fists against your abdomen and bend forward while exhaling.
- Keep your eyes open and look in front of you.
- Maintain this pose for 2-3 minutes and then come back to the vajrasana while inhaling.
- Repeat four-five times.
Bhadrasana

Steps:
- Starting in Vajasana (thunderbolt posture).
- Separate the knees as far as possible while keeping the toes in contact with the floor.
- Allow the buttocks and perineum to rest flat on the floor in between the feet. (if this is not possible place a blanket under the buttocks
- Without straining, try to separate the knees further.
- Place the palms onto the knees and lengthen the spine.
- Look to the tip of your nose (slightly cross eyed) and concentrate on keeping the eyes and mind still.
- Breath slowly and deeply, listening to the sound of your breath
- To exit, bring the knees together and come to any comfortable sitting posture.
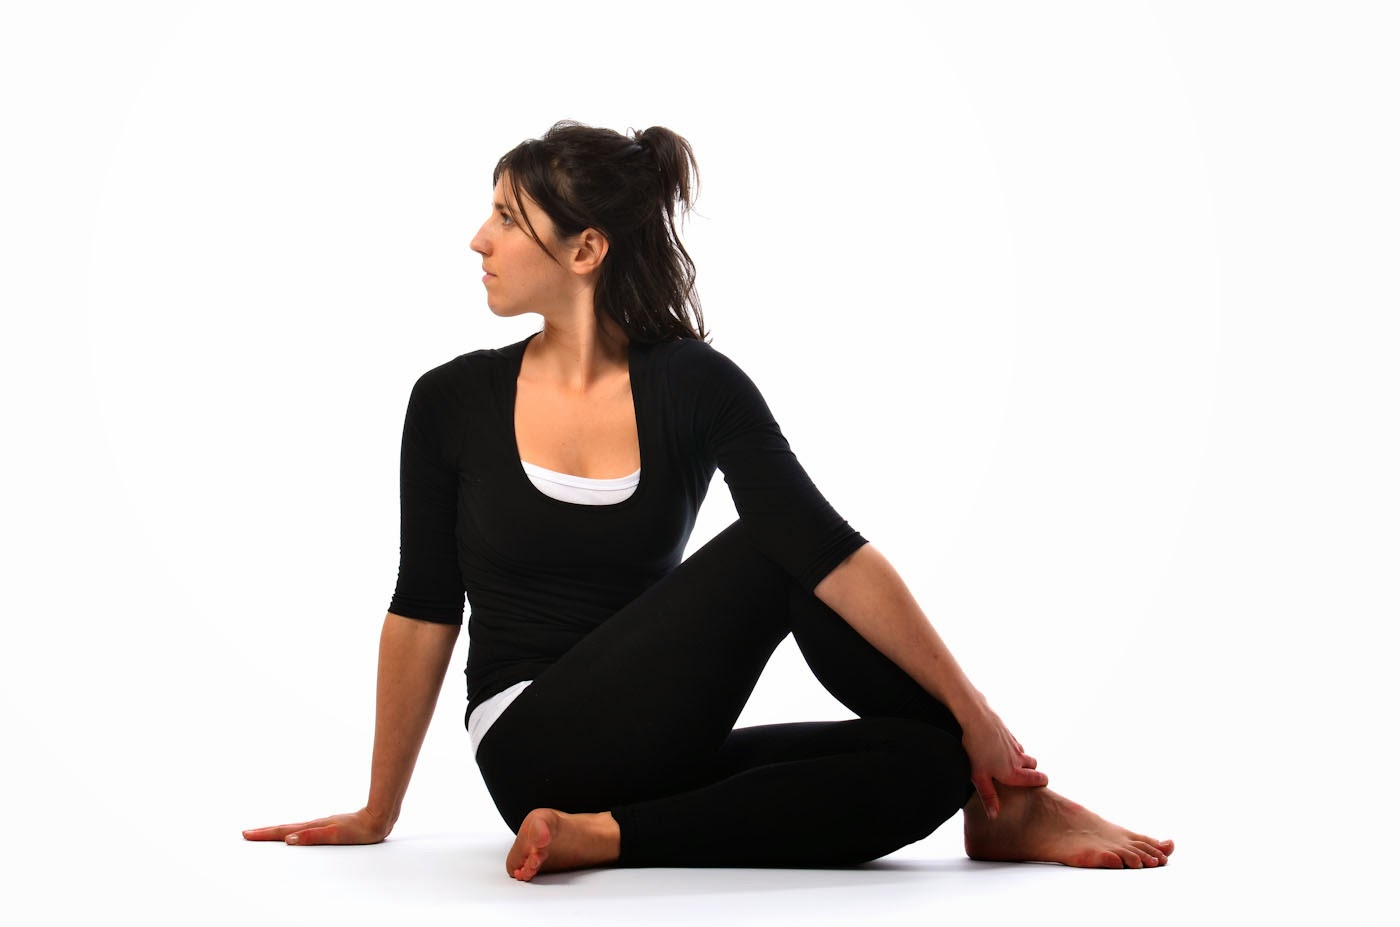
Ardha Matsyendrasana
Steps:
- Sit in any comfortable cross-legged position.
- Straighten the legs out in front. Bend the right knee and bring the heel of the right foot close to the left hip.
- Inhale and bend the left knee upward and place the left foot flat on the floor to the right of the right leg with the ankle touching the right thigh.
- While turning the spine to the left straighten the right arm bringing it around to the outside of the left knee and grasp the left foot with the right hand.
- Turn your head as far as possible to the left and bend the left arm behind your back. Keep your spine, neck and head aligned and continue to exert effort at turning to the left.
- Repeat the posture the other side by reversing directions 2-6.
Akarna Dhanurasana

Steps:
- Bend the left leg in knee and keep the foot on the thigh of right leg. Keep the right leg straight.
- Hold the big toe of the left leg with left hand, and that of the right leg with the right hand.
- Exhale, and inhaling start lifting the left leg with the left hand and pull it up to the left ear, and stabilize it at that point.
- Continue normal breathing.
- After few seconds come back to the original position.
- Now holding the right leg at big toe by fore finger and thumb of right hand raise it up to the right ear. Again after few seconds come back to the original position. This completes one round of Akarna Dhanurasana.
Belly Down - Prone Position (Yoga Postures in Prone position)
Belly down/ facedown position / prone yoga poses, where the belly faces downwards, build core body strength in the low back and abs
Makarasana : The Crocodile Pose
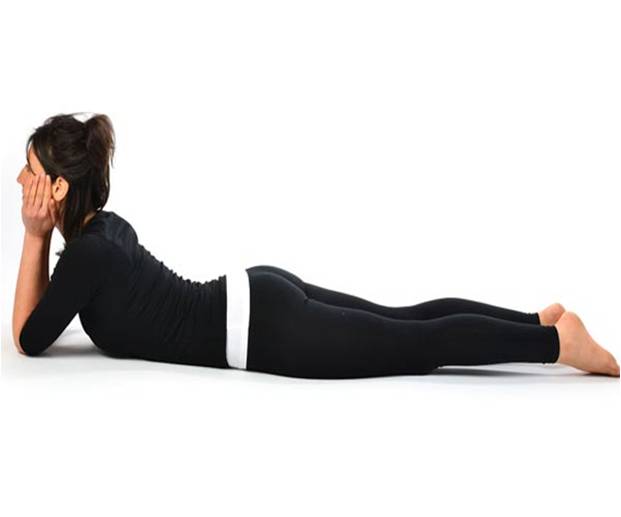
Steps:
- Lift the head and chest.
- Bend the arms at the elbows.
- Rest the elbows on the ground.
- Form a cup shape with both hands.
- Place the head on the heels of the hands.
- Place the head between the palms.
- Relax the whole body. Breathe normally and slowly. Feel the whole body touching the ground and the deep relaxation in all your muscles.e elbows.
Bhujangasana : Cobra Pose
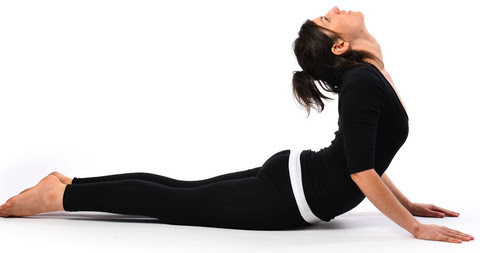
Steps:
- Lie on your stomach with your toes flat on the floor and forehead resting on the ground.
- Keep your legs close together, with your feet and heels lightly touching each other.
- Place your hands (palms downwards) under your shoulders, keeping your elbows parallel and close to your torso.
- Taking a deep breath in, slowly lift your head, chest and abdomen while keeping your navel on the floor.
- Pull your torso back and off the floor with the support of your hands. Put equal pressure on both the palms.
- Keep breathing with awareness, as you curve your spine vertebra by vertebra. If possible, straighten your arms by arching your back as much as possible; tilt your head back and look up. Shoulders should be away from your ears, Keep your shoulders relaxed, even if it means bending your elbows. With regular practice, you will be able to deepen the stretch by straightening the elbows.
- Ensure that your feet are still close together. Keep smiling and breathing. Smiling Cobras!
- Don’t overdo the stretch or overstrain yourself. Breathing out, gently bring your abdomen, chest and head back to the floor.
Ardha Shalabhasana
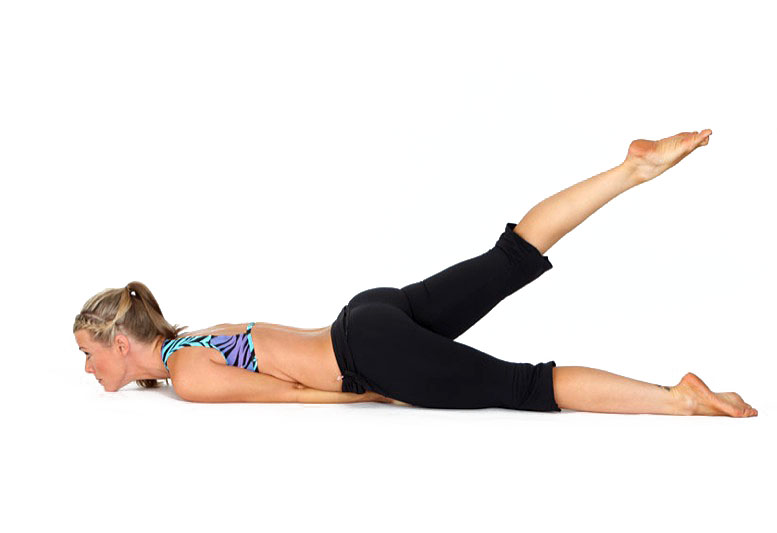
Steps:
- Lie flat on your abdomen and chest with the face downwards.
- Keep the hips close to the floor and the legs straight and close to each other.
- Keep your arms stretched back on the sides.
- Raise your head a little and place your chin on the floor.
- Clench your fingers into fists and place them on the floor facing upwards.
- Inhale and hold your breath.
- Pressing the fists down, raise backward your left leg as far up as you can, keeping the leg straight and outstretched.
- Hold the breath and maintain the position for about five seconds.
- Exhaling slowly, press the fists down and lower the leg without bending the knee.
- Repeat with the right leg.
Shalabhasana : The Locust or Grasshopper Posture
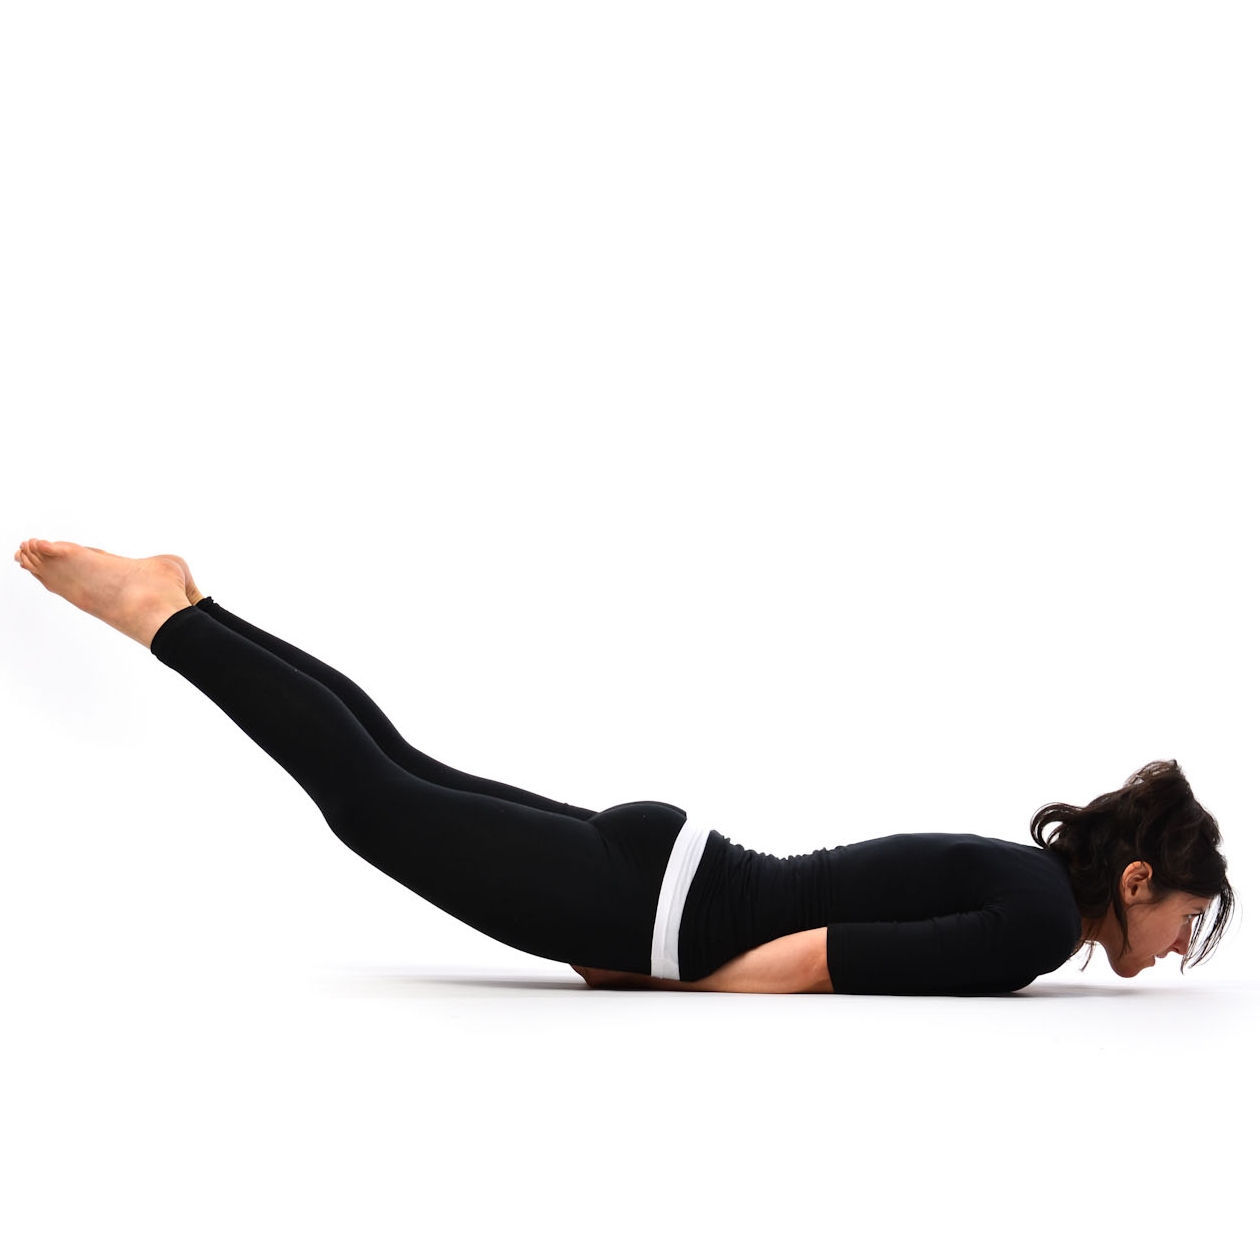
Steps:
- Lie on the stomach with the head turned to one side and the arms alongside the body with palms facing upward.
- Turn the head and place your chin on the floor. Slide your hands under your thighs, with the palms pressed gently against the top of your thighs.
- Inhale slowly and then raise the head, chest, and legs off the floor as high as possible. Tilt your head as far back as possible. Keep your feet, knees, and thighs pressed together.
- Starting at the top of the head and working your way down to the feet, bring your attention to each part of your body, consciously relaxing it before proceeding on to the next.
- Remain in the posture while holding the breath. You can support your legs by pressing the hands upward against your thighs.
- Hold the posture for as long as you can hold the inhaled breath then slowly return the legs, chest, and head to the floor while exhaling.
- Remove your hands from under your thighs and place the arms alongside your body. Turn your head to the side and rest.
Dhanurasana : The Bow Pose
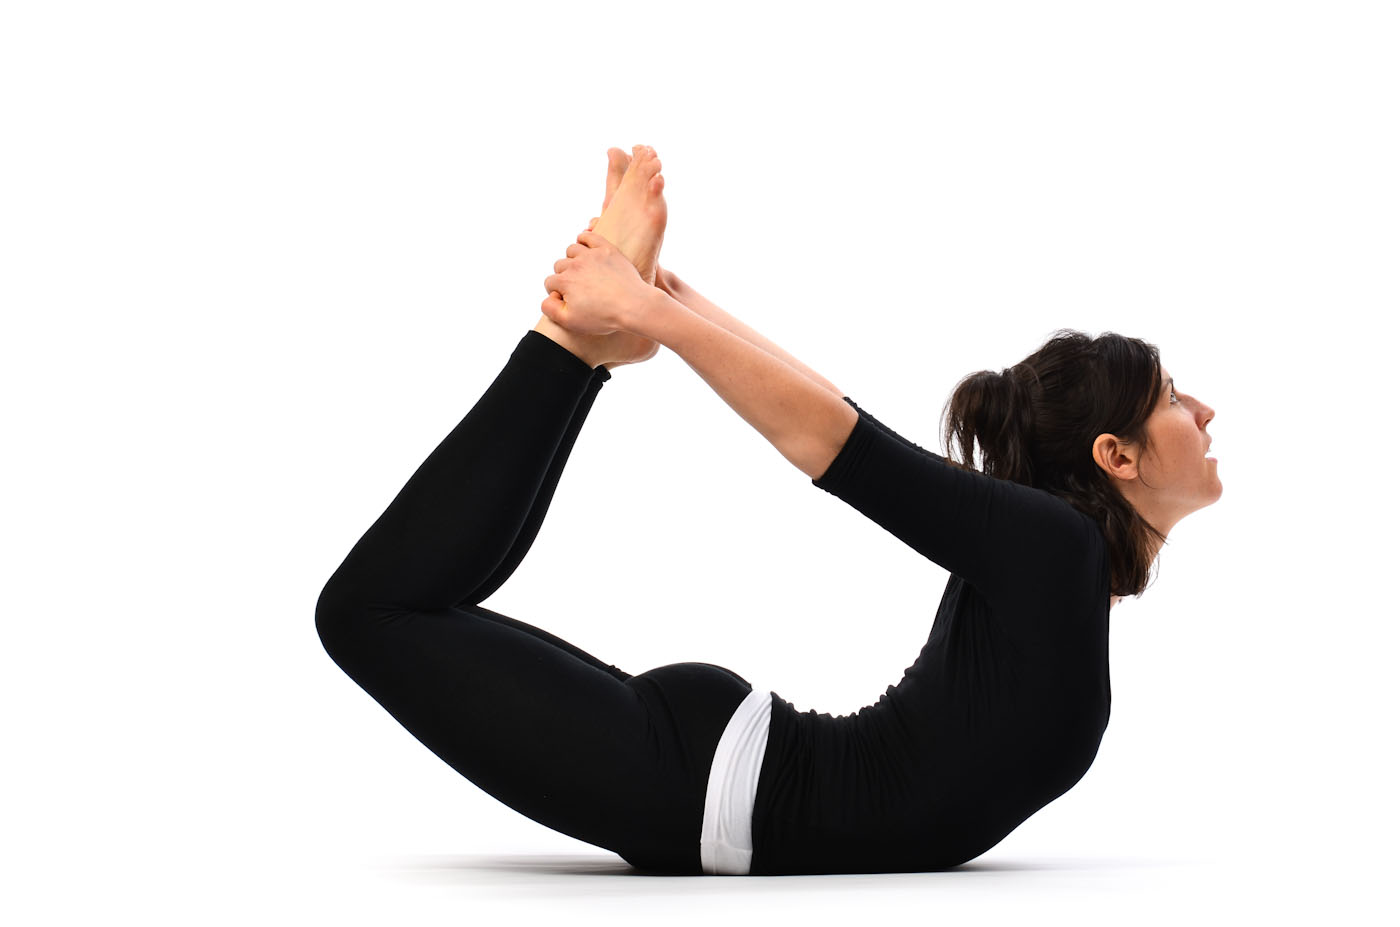
- Lie on the stomach with the head turned to one side and the arms alongside the body with palms facing upward.
- Turn the head and place the chin on the floor. Exhale, bend the knees, reach back with the arms and grasp the right ankle with the right hand and the left ankle with the left hand.
- While inhaling, slowly raise the legs by pulling the ankles up and raising the knees off the floor while simultaneously lifting the chest off the floor. Hold the inhaled breath. The weight of the body should be resting on the abdomen.
- Tilt the head as far back as possible. Hold the posture as long as you can comfortably hold the inhaled breath.
- Slowly exhale bringing the knees to the floor, release the ankles, slowly bring the legs and arms straight down on the floor and turn the head to one side, assuming the prone posture you began with..
Supine Position (Yoga Postures in Supine position)
Supine (supta in Sanskrit) poses, done lying on your back, release stress, promote flexibility, and help to integrate your practice. Lie down on the back with legs together, straight extended, the toes erect and hands straight and palms resting on the floor.
Pavanamuktasana : The Wind Relieving Pose

Steps:
- Lie flat on the back in the shava-asana.
- Inhale and bend the right knee and pull it close to the torso with both hands while interlocking the fingers just below the knee. Keep the left leg flat on the floor.
- Hold the inhaled breath for a few seconds then exhale slowly through the nostrils and lift the back, shoulders and head off the floor and touch the knee with the forehead.
- Hold the exhaled breath for a few seconds then slowly inhale and return the back, shoulders and head to the floor. Remain holding the knee.
- Hold the inhaled breath for a few seconds then exhale while bringing the right leg to the floor.
- Lie flat on the back in the shava-asana for a few seconds then repeat beginning with the left leg.
- Hold each of the four parts of this posture (corresponding with the held breaths) for three to five seconds each. Repeat the purvasa-mukta-asana three to five times on each side.
Ardha Halasana
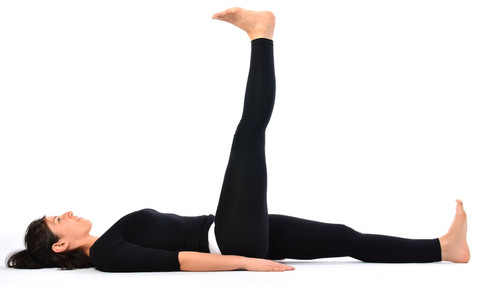
Steps:
- Lie flat on your back.
- Stretch your legs at full length.
- Keep the heels and the big toes together.
- Stretch your arms on the respective sides with palms turned down.
- Inhaling, press the palms down and raise first one leg slowly as high as possible without bending the knee, keeping the other leg flat on the floor.
- Hold the leg straight up until you complete the inhalation.
- Exhaling, bring the leg down slowly.
- Repeat the process with the other leg also.
- Take three turns, alternating the legs.
- Inhaling, press the palms down and, without bending the knees or raising the hands, raise the legs together slowly till they make an angle of 30 degrees to the ground, then 60 degrees, and, finally, bring them perpendicular at 90 degrees to the ground.
- Complete the inhalation.
- Fix your gaze on the big toes.
- Remain in this position as long as you can hold your breath comfortably.
- Exhaling, press the palms down again, and without bending the knees, bring down your legs together slowly, pausing for five seconds each as they reach 60 degrees and 30 degrees to the ground.
- Execute three turns, raising both legs together.
Hala Asana : The Plow Pose
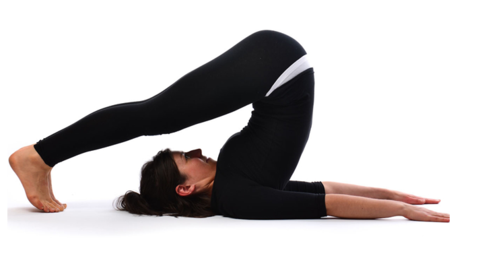
Steps:
- Lie flat on the back in the shava-asana.
- Inhale through the nostrils. Place the palms face-down on the floor. Keeping the hips on the floor, bend the knees and bring them up toward the stomach while exhaling.
- Inhale, then while exhaling, raise the legs straight up perpendicular to the floor. You may support your hips with your hands or leave the arms flat on the floor, whichever is most comfortable.
- Exhale and continue to raise the legs over the head, bending at the waist, lifting the back and buttocks until the toes touch the floor directly in back of the head. Keep the feet together. If the lower back is supported by the hands try returning the arms flat to the floor with the palms facing down. If you are unable to comfortably place the arms on the floor continue to support the lower back with the hands.
- Keep the knees straight. Breath slowly through the nostrils and hold the posture for several minutes. If you cannot touch the floor with your toes hold them as close to the floor as possible and continue to exert effort to lower them.
- Reverse the steps to return to the shava-asana.
Naukasana : Boat Pose

Steps:
- Lie flat on the back keeping legs together and arms by the side of the body.
- Take a deep breath and hold it in while raising head, shoulders, arms, trunk and legs simultaneously from the ground.
- Keep the arms in line with the toes and at the same level of toes. Keep the arms straight with the palms down. Look towards the toes.
- Remain stable in the position while holding the breath for a minimum of 5 seconds or more, if possible.
- Return to the ground slowly as you exhale.
- Relax the whole body and take 3-5 long and deep breaths.
Shavasana : The Corpse Pose
The Corpse Pose or Savasana is a simple relaxing pose that is done in between or after an Asana.
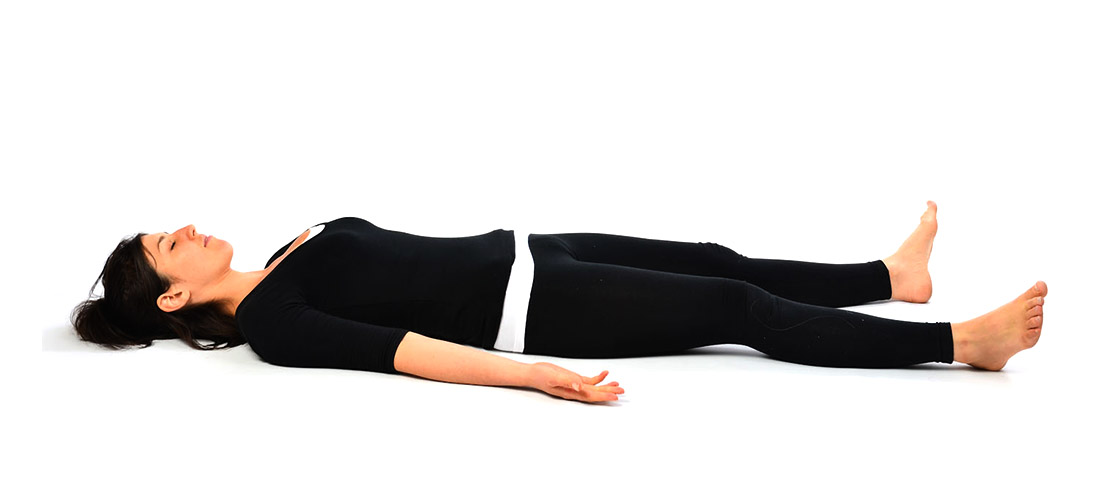
Steps:
- Lie flat on your back with your legs together but not touching, and your arms close to the body with the palms facing up.
- Keep your eyes gently closed with the facial muscles relaxed and breath deeply and slowly through the nostrils.
- Starting at the top of the head and working your way down to the feet, bring your attention to each part of your body, consciously relaxing it before proceeding on to the next.
- Remain in the shava-asana for between 3 and 5 minutes or longer. If you become sleepy while in the shava-asana begin to breath a bit faster and deeper.


0 Comments